Thinglink Skills Assessment
Narrative Scripts: What are the contours and elements?
Geospatial History: In your working groups, review the following two examples of geospatial digital history.
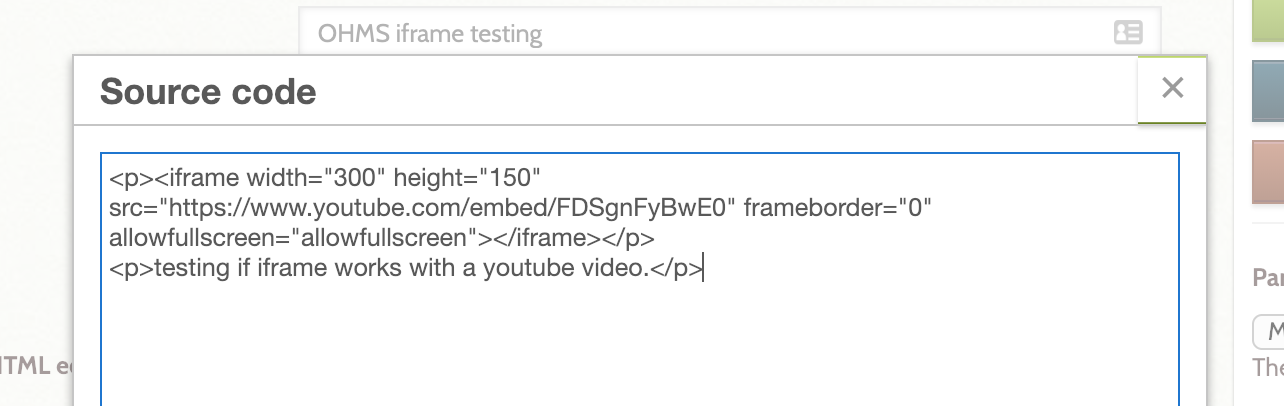
Omeka allows scholars to enhance their digital exhibits using an iFrame. An iFrame is an HTML code that you can insert into your Omeka’s source code via the system’s admin dashboard. It’s useful when you want to embed interactive content that’s hosted somewhere else like a video on YouTube, an interactive map using StoryMapJS, or interactive timeline like TimelineJS.
1. Make sure in the Omeka Admin Dashboard to go to Settings then Security and then scroll down the page to HTML Filtering. Make sure the box is unchecked.
2. For a static page or an exhibit page, locate the text box where you can add and style written or media content.
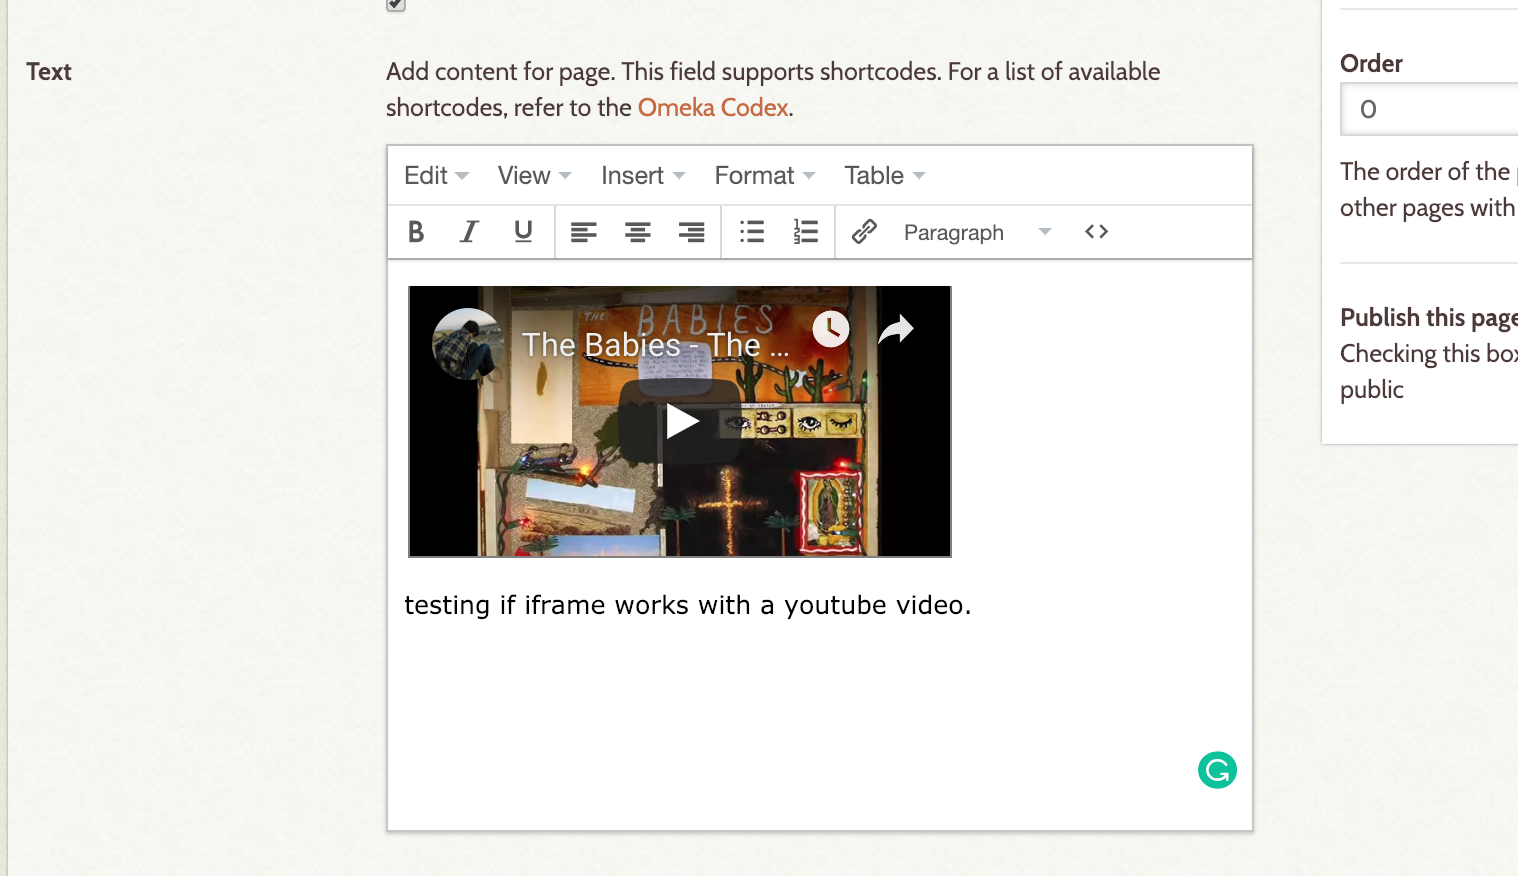
3. Click on the <> icon in the text editor and then copy and paste your iframe HTML code and save.
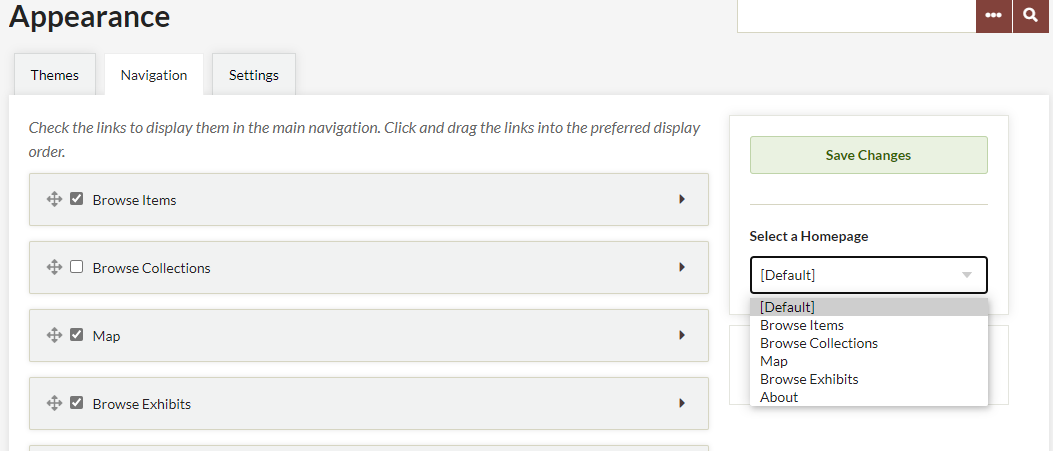
The Navigation section in Appearance lets you manage your Omeka’s public navigation by ordering, editing, and adding navigation links, and by selecting a homepage.
Access Navigation settings by clicking Appearance in the top navigation menu in the admin dashboard and then going to the Navigation tab in that section.
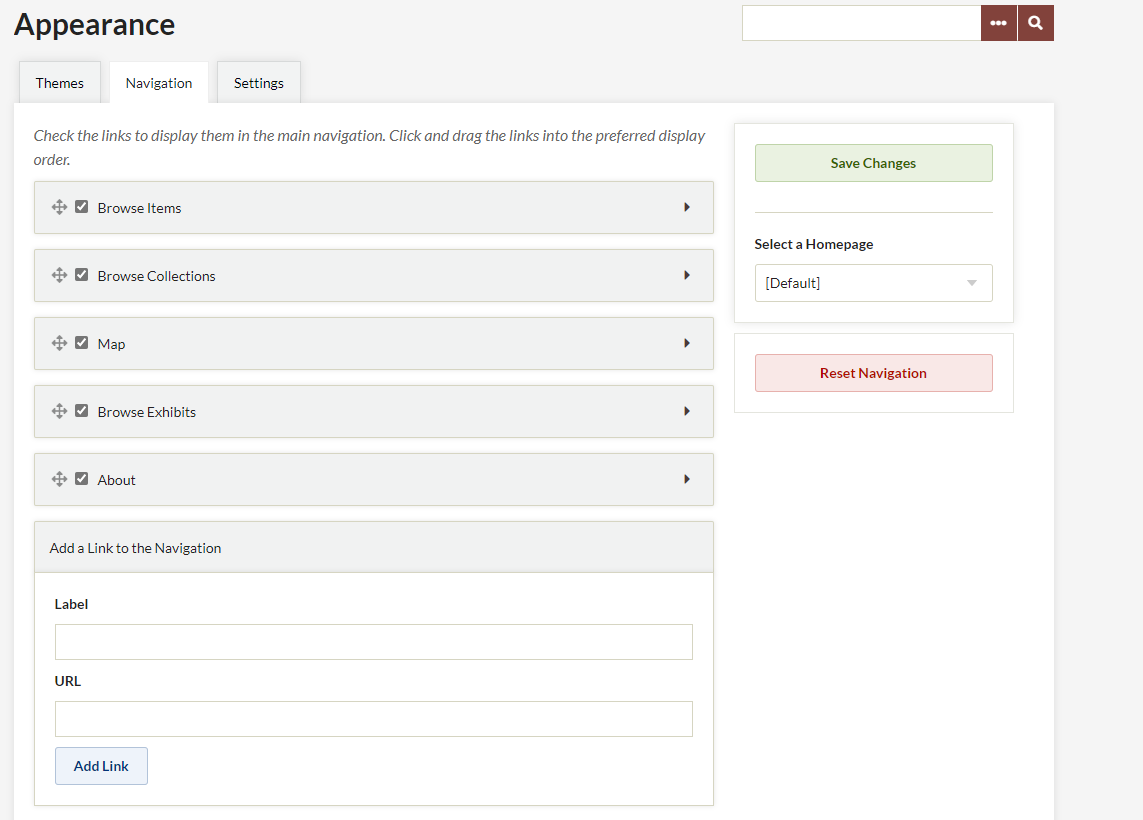
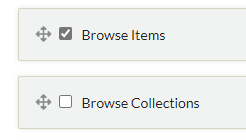
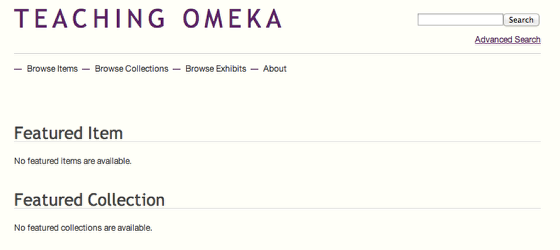
Omeka includes links to Browse Items and Browse Collections by default. If you have installed Simple Pages, the About page will also appear by default, and any published Simple Pages will be automatically added to the navigation. Likewise, once you have installed Exhibit Builder, Browse Exhibits will automatically appear in the navigation.
You may arrange navigation items in any order by dragging and dropping.
The checkbox located to the left of each section or page title indicates when a navigation link is visible on the public site. For example, if you don’t want Browse Collections to display, uncheck the box.
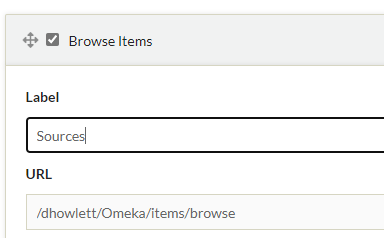
To rename the links to different pages and sections in the site’s navigation, click the arrow found to the right of the page or section’s title to reveal the Label and URL.
Edit the word or phrase that appears in the Label text box. For instance, you may change “Browse Items” to “Sources,” or to any term or phrase you choose.
To add menu navigation for a specific collection, exhibit, or item, see the section on links, below.
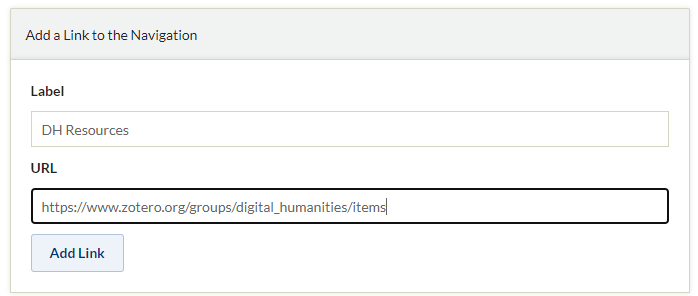
In the section, “Add a Link to the Navigation,” you may add links to other content, whether on your site or elsewhere.
Choose a Label, or title for the link, and paste in the URL to the external or internal webpage.
Click “Add Link.”
You may change the homepage of your installation by selecting a page from the dropdown menu located under the heading “Select a Homepage,” found on the right side of the screen. The dropdown lists all of the public navigation links you created.
Select the desired page from the list and click save changes to designate a new homepage.
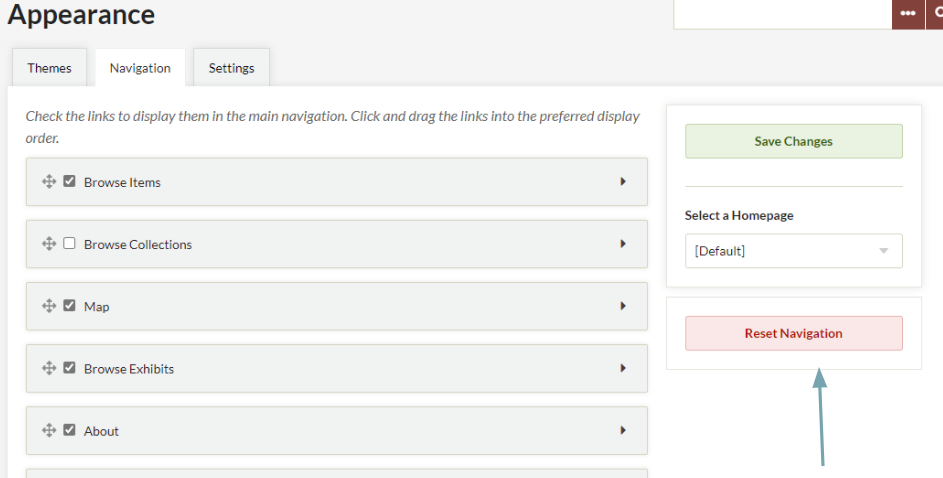
To reset the navigation back to Omeka default, click the Reset Navigation button below the Save Changes button and Homepage dropdown. Please note that all customizations will be lost: navigation item order and custom labels will revert to Omeka defaults, and custom links will be lost.
All, I have decided to make some adjustments so we spend a little more time workshopping in class. How this is going to work is that I will review some elements of the Omeka Exhibit, as well as finish our Timeline Lecture. During this week, we will take time to work simultaneously on our Skills Assessments for Omeka and the Timeline, which means you all have no homework except to start outlining your project and gathering items to enter into your timeline. Be prepared to workshop and troubleshoot together!
To prep for class on Tuesday, please work on your outline. Here is an example of a completed outline from a prior student (please note: this is her final outline, but she worked on it as she was working on the digital project):
Skill Assessment (start in class; due by 10am on November 16):
Now that you’ve added five items to Omeka you will use these to create an exhibit. To create exhibits, we will use Omeka’s Exhibit Builder plugin which “allows you to develop online exhibits, or special web pages, that combine items from your Omeka archive and may include narrative text.”[1]
As Omeka’s Exhibit Builder documentation explains: “Exhibits are composed of pages, generally an initial page that introduces your exhibit and subsequent pages composed of the items from your Omeka database that you wish to highlight and/or relate to each other. Exhibit Builder exhibits may be as short as one page or consist of multiple pages. You can make the pages of an exhibit hierarchical.”
The layout of exhibits “is highly customizable, with the pages composed of smaller units called blocks. There are three content block types which come with Exhibit Builder … file with text, gallery, and text block.”
There is no right or wrong way to format your exhibit. You may wish to take a look at some of the examples that were discussed in last week’s class for ideas on how to format your exhibit. It often helps to draw the exhibit on paper before you begin building and the Omeka Exhibit Builder Documentation contains an excellent tutorial on using the plugin.
Your exhibit:
Remember, this assignment is not only about the technology behind Omeka, but also about the craft of writing for the web.
After Class (due by 10am on November 16):
In-Class (November 9/11):
Skills Assessment: Timeline (start in class on November 9), Embed timeline no later than 10am on November 16):
After Class (due by 10am on November 16):
Class Prep (for November 16):
Dear Reader:
(The hypothesis/claim/assertion/research question) I want to convince you that…/I want to recast my topic from X to demonstrate Y…/I want to provide a more nuanced interpretation of…/I want to show the significance of…/I want to examine X evidence to…/I want to reassess my topic based on…
(The summary of evidence/sources/logic) The main reasons why you should “believe” me are that…
(Checks the significance of your topic) You should care about my topic because…
From, Love, Forever indebted,
Me
Accommodations: If you are a student with a disability and you need academic accommodations, please contact the Office of Disability Services at 703-993-2474 or http://ods.gmu.edu. Please particularly consult the updated policies and FAQ in response to COVID-19: https://ds.gmu.edu/response-to-covid-19/
Communication: The best way of reaching me quickly is via Slack. I will respond to you promptly within 24 hours. I will hold office hours by appointment on Zoom.
COVID 19 Response: For medical emergencies and questions, please consult your medical provider and the Student Health Services site: https://shs.gmu.edu/ .
Please also consult the Frequently Asked Questions for a Safe Return to Campus: https://www2.gmu.edu/safe-return-campus/faqs-for-safe-return
Please let me know if there are any medical issues that I need to know about.
Diversity Statement: “George Mason University promotes a living and learning environment for outstanding growth and productivity among its students, faculty, and staff. Through its curriculum, programs, policies, procedures, services, and resources, Mason strives to maintain a quality environment for work, study and personal growth.
An emphasis upon diversity and inclusion throughout the campus community is essential to achieve these goals. Diversity is broadly defined to include such characteristics as, but not limited to, race, ethnicity, gender, religion, age, disability, and sexual orientation. Diversity also entails different viewpoints, philosophies, and perspectives. Attention to these aspects of diversity will help promote a culture of inclusion and belonging, and an environment where diverse opinions, backgrounds, and practices have the opportunity to be voiced, heard and respected.
The reflection of Mason’s commitment to diversity and inclusion goes beyond policies and procedures to focus on behavior at the individual, group and organizational level. The implementation of this commitment to diversity and inclusion is found in all settings, including individual work units and groups, student organizations and groups, and classroom settings; it is also found with the delivery of services and activities, including, but not limited to, curriculum, teaching, events, advising, research, service, and community outreach.
Acknowledging that the attainment of diversity and inclusion are dynamic and continuous processes and that the larger societal setting has an evolving socio-cultural understanding of diversity and inclusion, Mason seeks to continuously improve its environment. To this end, the University promotes continuous monitoring and self-assessment regarding diversity. The aim is to incorporate diversity and inclusion within the philosophies and actions of the individual, group and organization, and to make improvements as needed.”
Medical issues: Please consult Student Health Services or another physician if you need medical attention: https://shs.gmu.edu/
Please let me know if there are any medical issues that I need to know about.
Counseling and Psychological Services: https://caps.gmu.edu/
Enrollment Status: You are responsible for verifying your enrollment status in this (and every) course. Any change in that status is your responsibility and must be made by the dates listed in the Schedule of Classes. After the last day to drop a course, withdrawal from the course must be approved by the Dean and will be approved only for nonacademic reasons. Attempting to add a class after the last day to add is not possible. Undergraduate students wishing to drop a class after the drop date may choose to exercise a selective withdrawal. See the Schedule of Classes for selective withdrawal procedures.
Honor Code and Academic Integrity: Please consult the resources from the Office of Academic Integrity, including the GMU Honor Code, here: https://oai.gmu.edu/
If you aren’t familiar with it, please also consult the “Understanding Plagiarism” tutorial created by GMU Libraries: https://library.gmu.edu/tutorials/plagiarism
Dates and deadlines listed on this page include full semester: Fall 2021 Academic Calendar | Office of the University Registrar | George Mason University (gmu.edu)
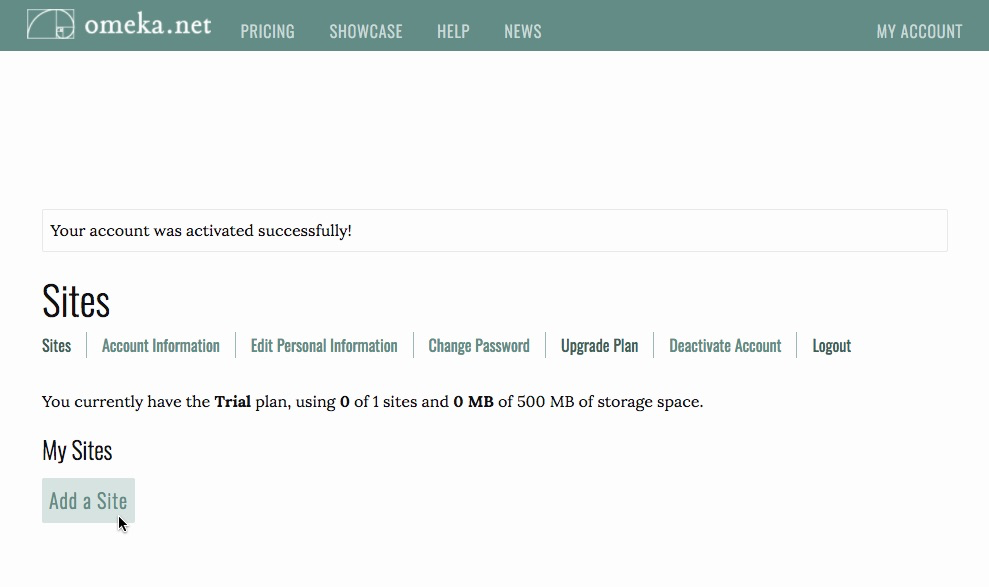
After you’ve clicked on the link in your email, click on Add a Site.
Fill in information about your site’s URL, the title you want to use, and a description if you’d like. Click on Add Your Site.
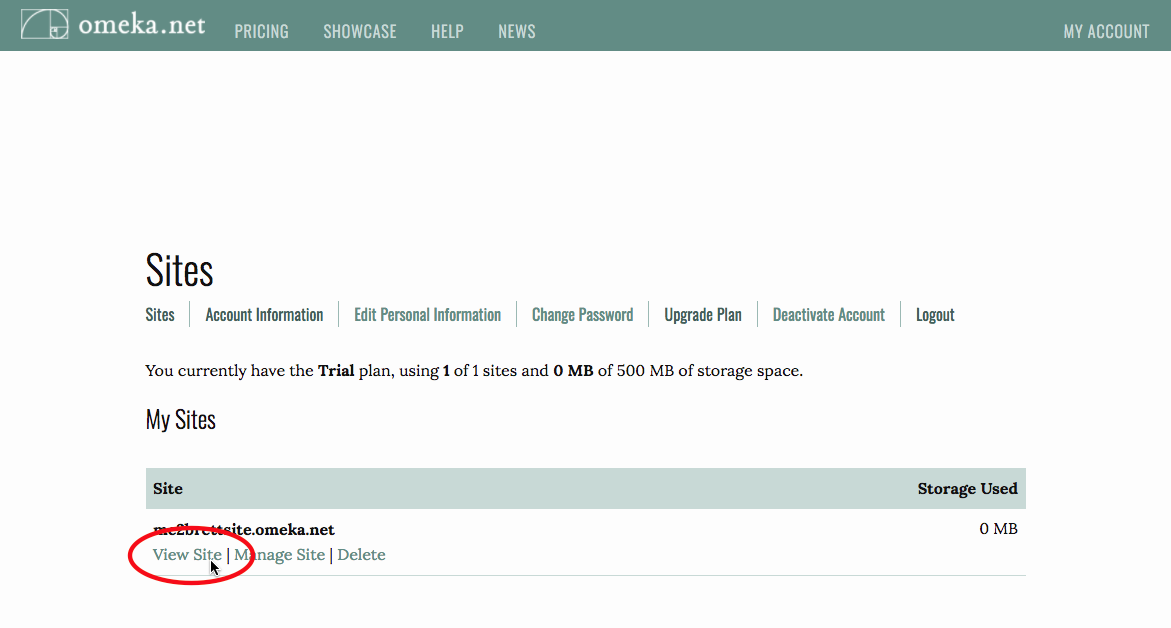
To see what it looks like, click on View Site.
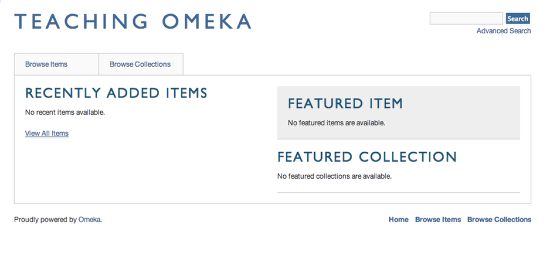
This is your empty Omeka site, waiting to be filled in. To get back to your dashboard, click the Back button or enter http://www.omeka.net/dashboard. This time, click onManage Site.
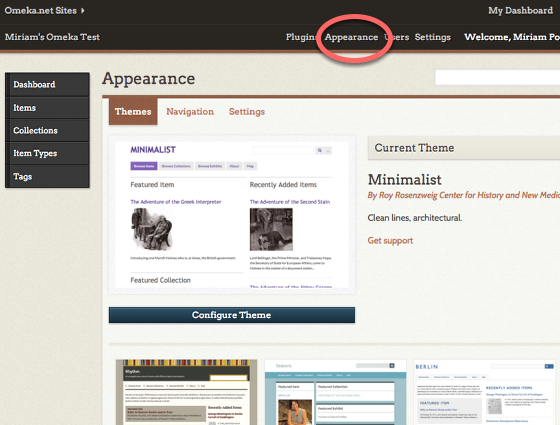
Omeka allows you to change the look of your public-facing site by switching themes. To do this, click on Appearance (at the top right of your dashboard). Switch themes by selecting one of the options on the page. Press the green Use this theme button to activate your new theme. Then visit your public site by clicking on the name of your site at the top left of the page.
Once you’ve checked out your new theme, head back to your dashboard. You can switch back to your old theme, stick with this one, or select one of the other options.
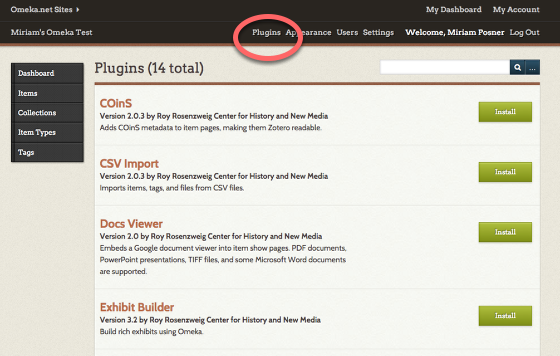
Your Omeka site comes with plugins, which offer some extra functionality. We need to enable them. To do that, click on the Plugins menu item at the top right. On the following page, click the Install button for Exhibit Builder (leave the options as they are on the page that follows) and Simple Pages.
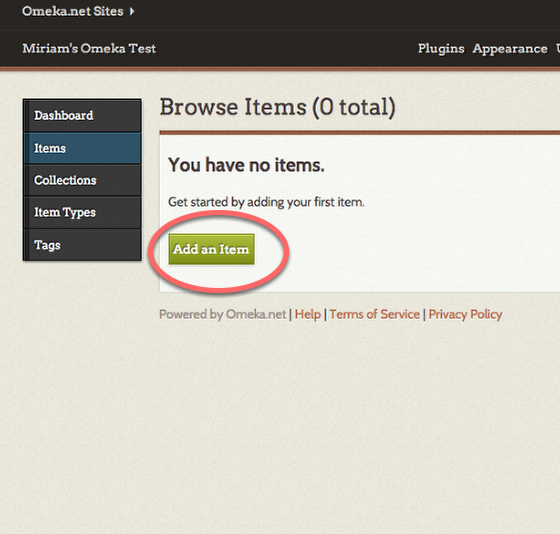
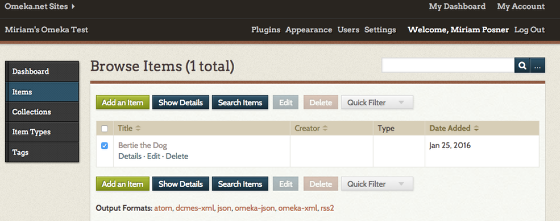
Click on Items on the left-hand menu and then (naturally!) Add an item.
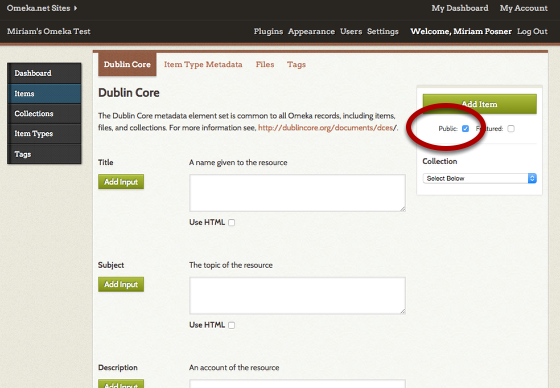
Remember, Dublin Core refers to the descriptive information you’ll enter about your item. All of this information is optional, and you can’t really do it wrong. But try to be consistent.
Be sure to click the Public checkbox so that your item is viewable by the general public. If you don’t click that box, only people who are logged into your site will be able to see the item.
To add multiple fields — for example, if you want to add multiple subjects for your item — use the green Add input button to the left of the text boxes.

I’m creating an item record for my dog, Bertie. But am I describing Bertie himself or aphotograph of Bertie? If it’s the former, the Creator would be — well, I guess that depends on your religious outlook. If it’s the latter, the creator would be Brad Wallace, who took the photo.
The decision about whether you’re describing the object or the representation of the object is up to you. But once you’ve decided, be consistent.
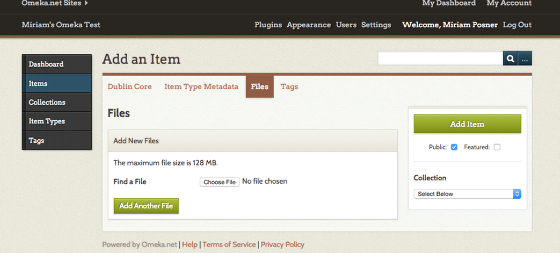
Once you’ve finished adding Dublin Core metadata, you can attach a file to your item record by clicking Files at the top of the Dublin Core form. (You don’t have to click Add Item before you do this; Omeka will automatically save your information.) You can add multiple files, but be aware that the Basic plan only comes with 500 MB of storage space.
Once you’ve added a file or files, you can add Tags by clicking on the button. You can also click on Item Type Metadata to choose the kind of thing — person, place, animal, vegetable, mineral — your item is. If you don’t see the appropriate item type for your item, don’t worry. We can add a new item type later.
When you’re all done, click the green Add Item button.
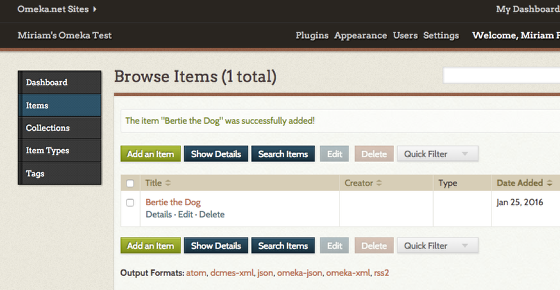
This list contains all the items you’ve added. If the item were not public, it would have (Private) after the title. To see what the page for your new item looks like, click on the name of the item.
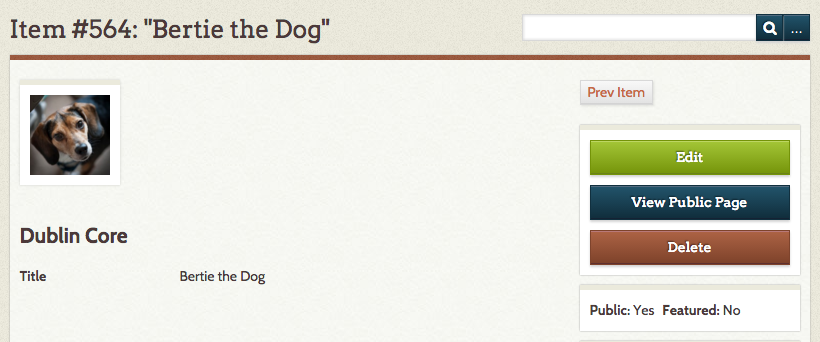
It may look like it, but this page isn’t what a non-logged-in user will see when she navigates to the page for your item. To see what a user would see, click on the blueView Public Page button on the right. (Or you can edit the item by clicking on Edit this item at the top right.)

This is what a general user will see if she navigates to your page.
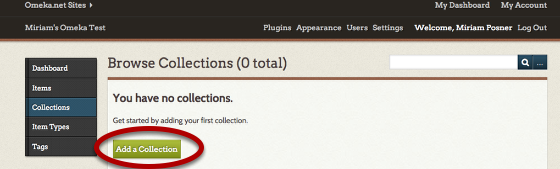
You can begin to bring order to your list of items by grouping them together in collections. To do this, return to your dashboard, click on the Collections tab, and click on Add a Collection.

In Omeka, metadata is king! Enter some information about your new collection, and remember to click on the Public button near the bottom of the page. Then save your collection.
To fill up the collection you just created, click on the Items tab. From your Browse Items list, click the boxes of the items that belong in your new collection. Then click on the Edit button.
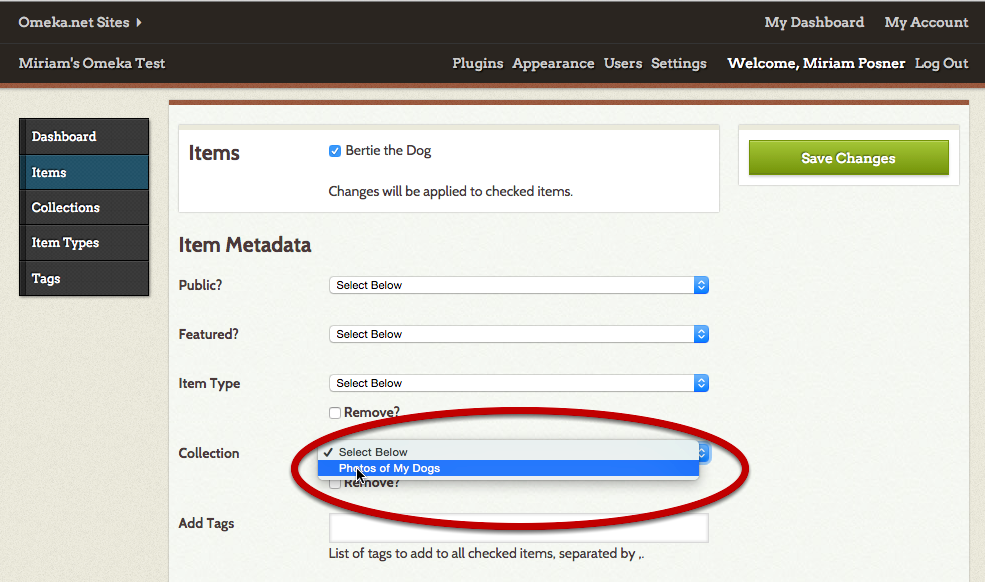
On the Batch Edit Items page, select the Collection you’d like to add your items to. (Also, take note of all the other things you can do on this page.)
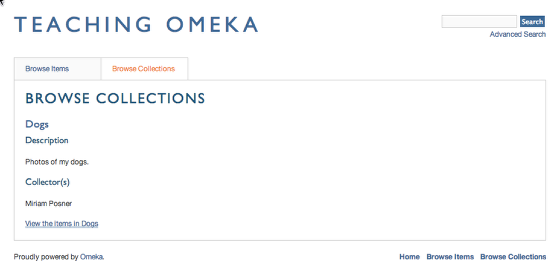
Return to your public site. If you click on the Browse Collections tab on the public-facing site, you should now have a new collection containing the items you identified.
Now that you’ve added some items and grouped them into a collection, take some time to play with your site. It’s beginning to take shape now that you have both individual items and thematic units. But Omeka can do even more. We’ll talk about that in the next lesson.
The Omeka team has put together great resources on the software’s help pages
Miriam Posner , “Up and Running with Omeka.net,” Programming Historian (17 February 2016),